Templates
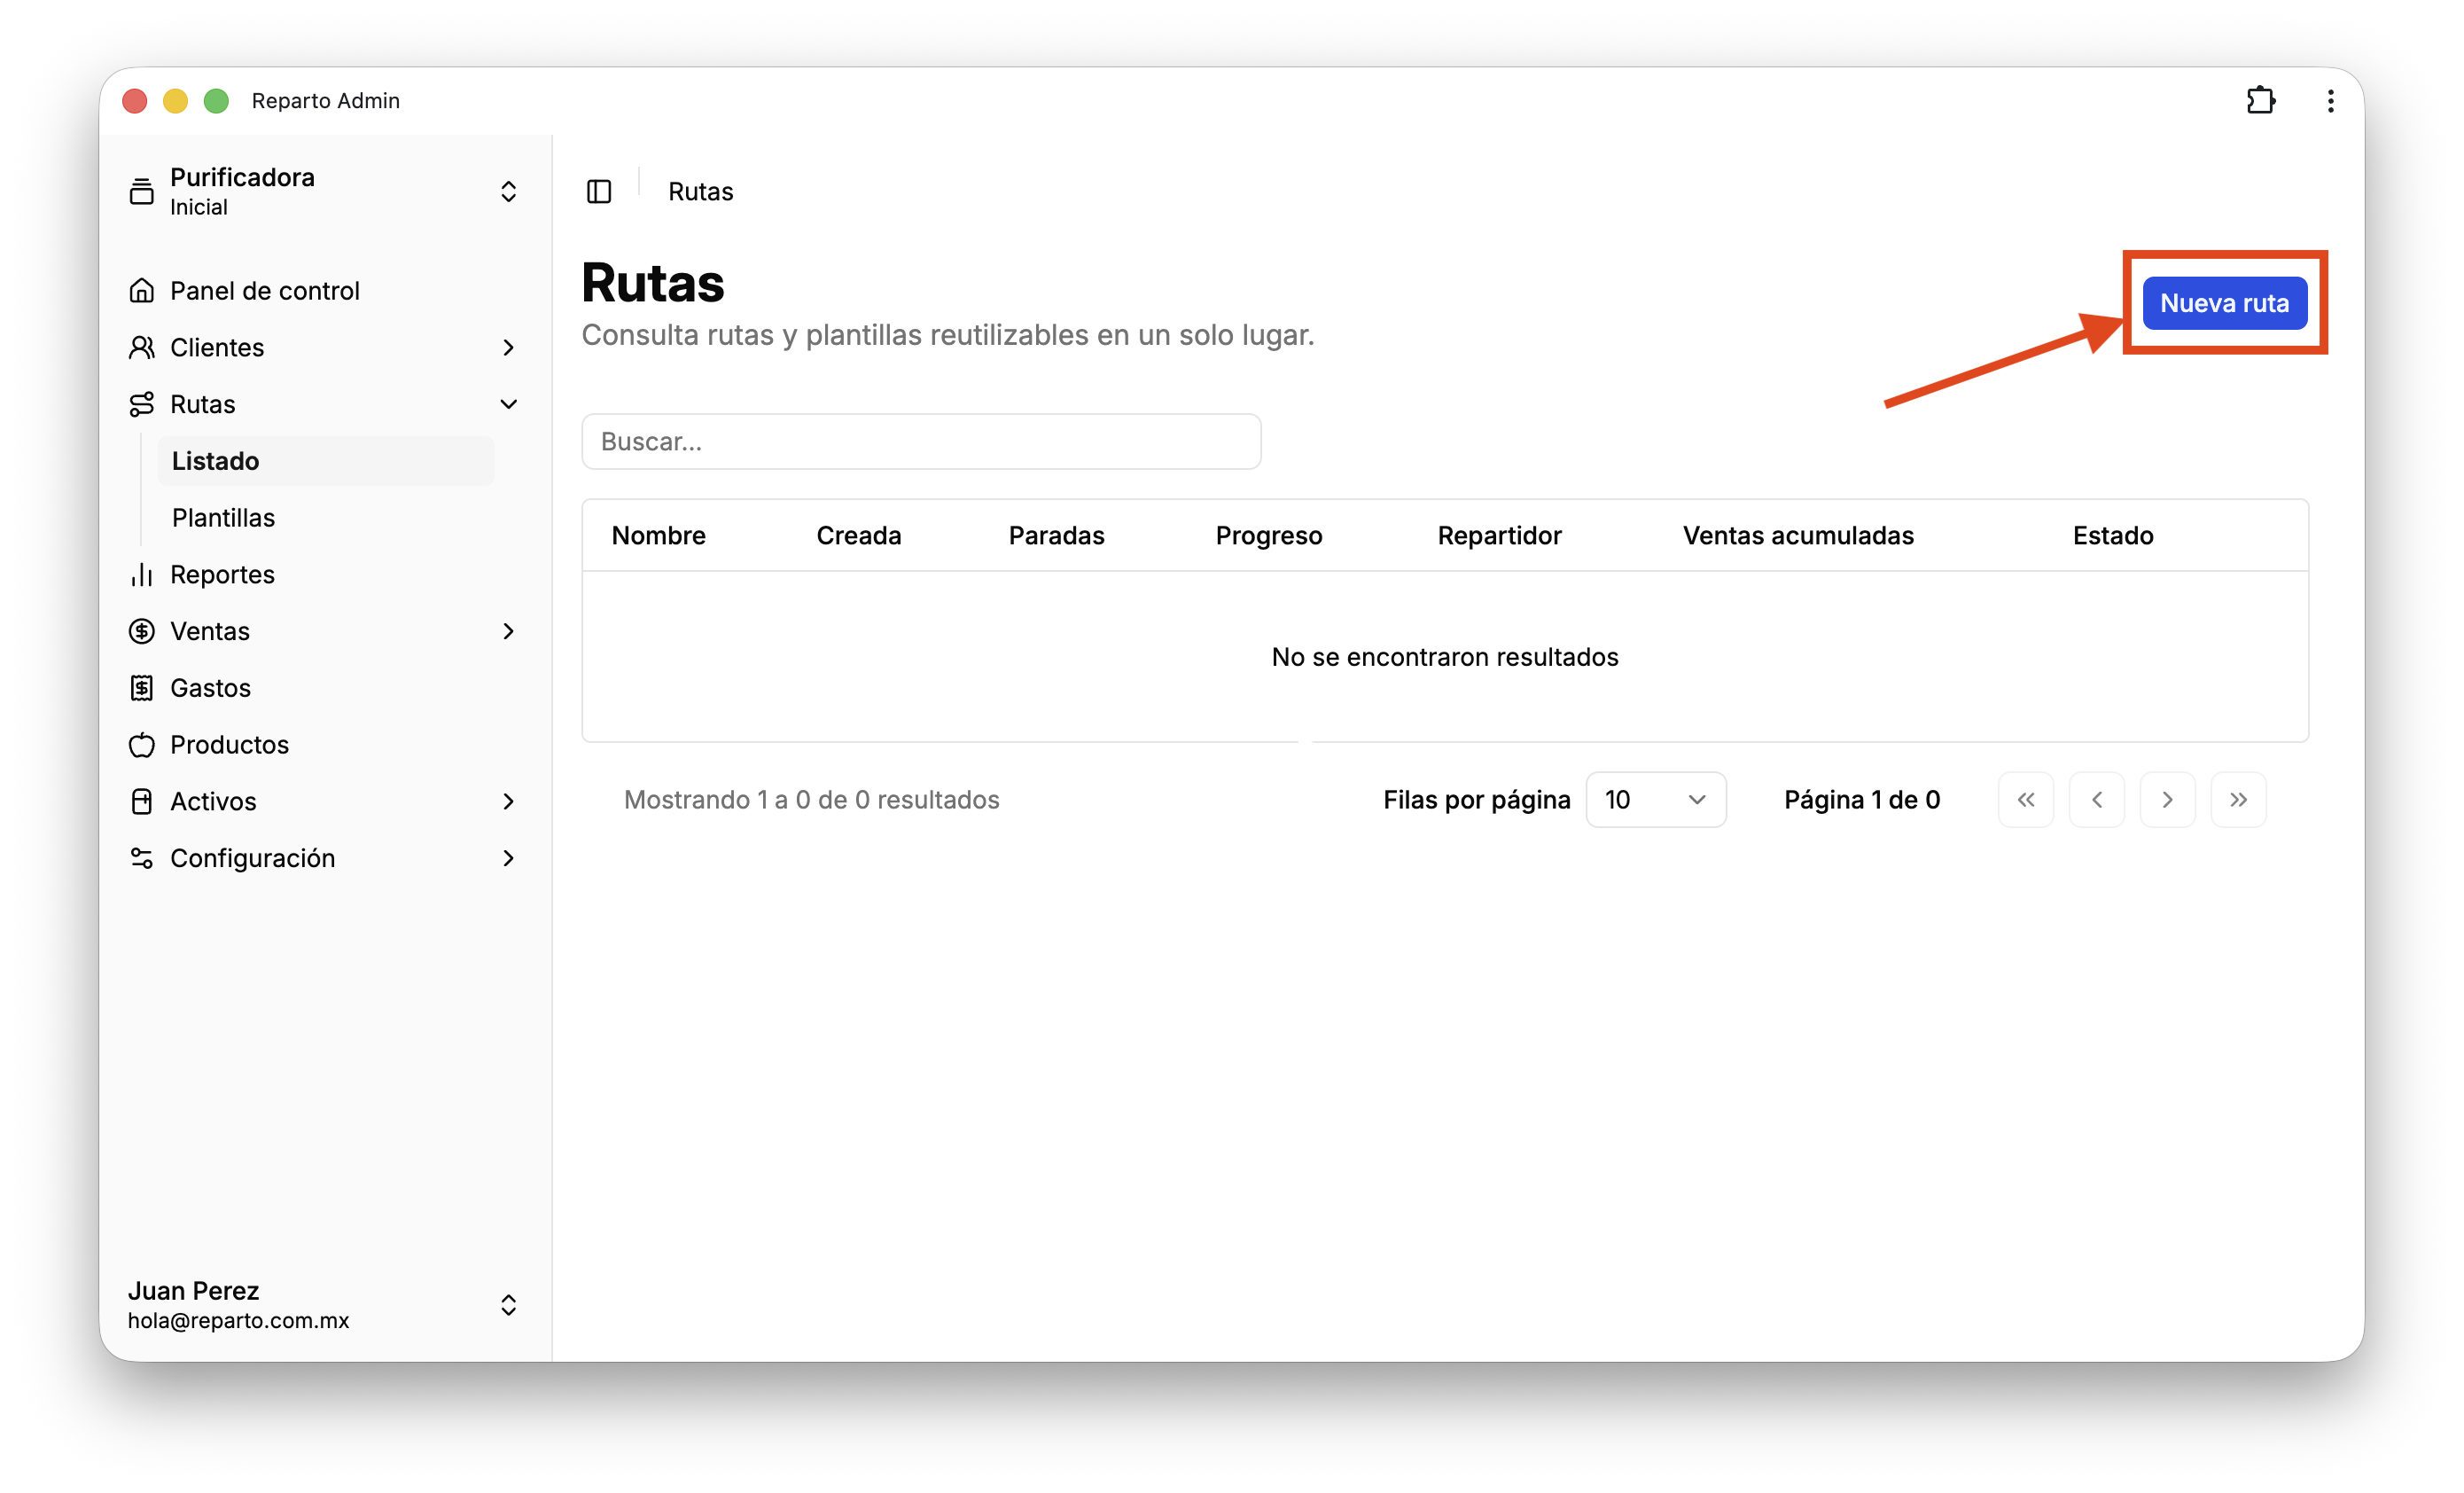
To create a route, go to the Routes tab and press the Create route button.
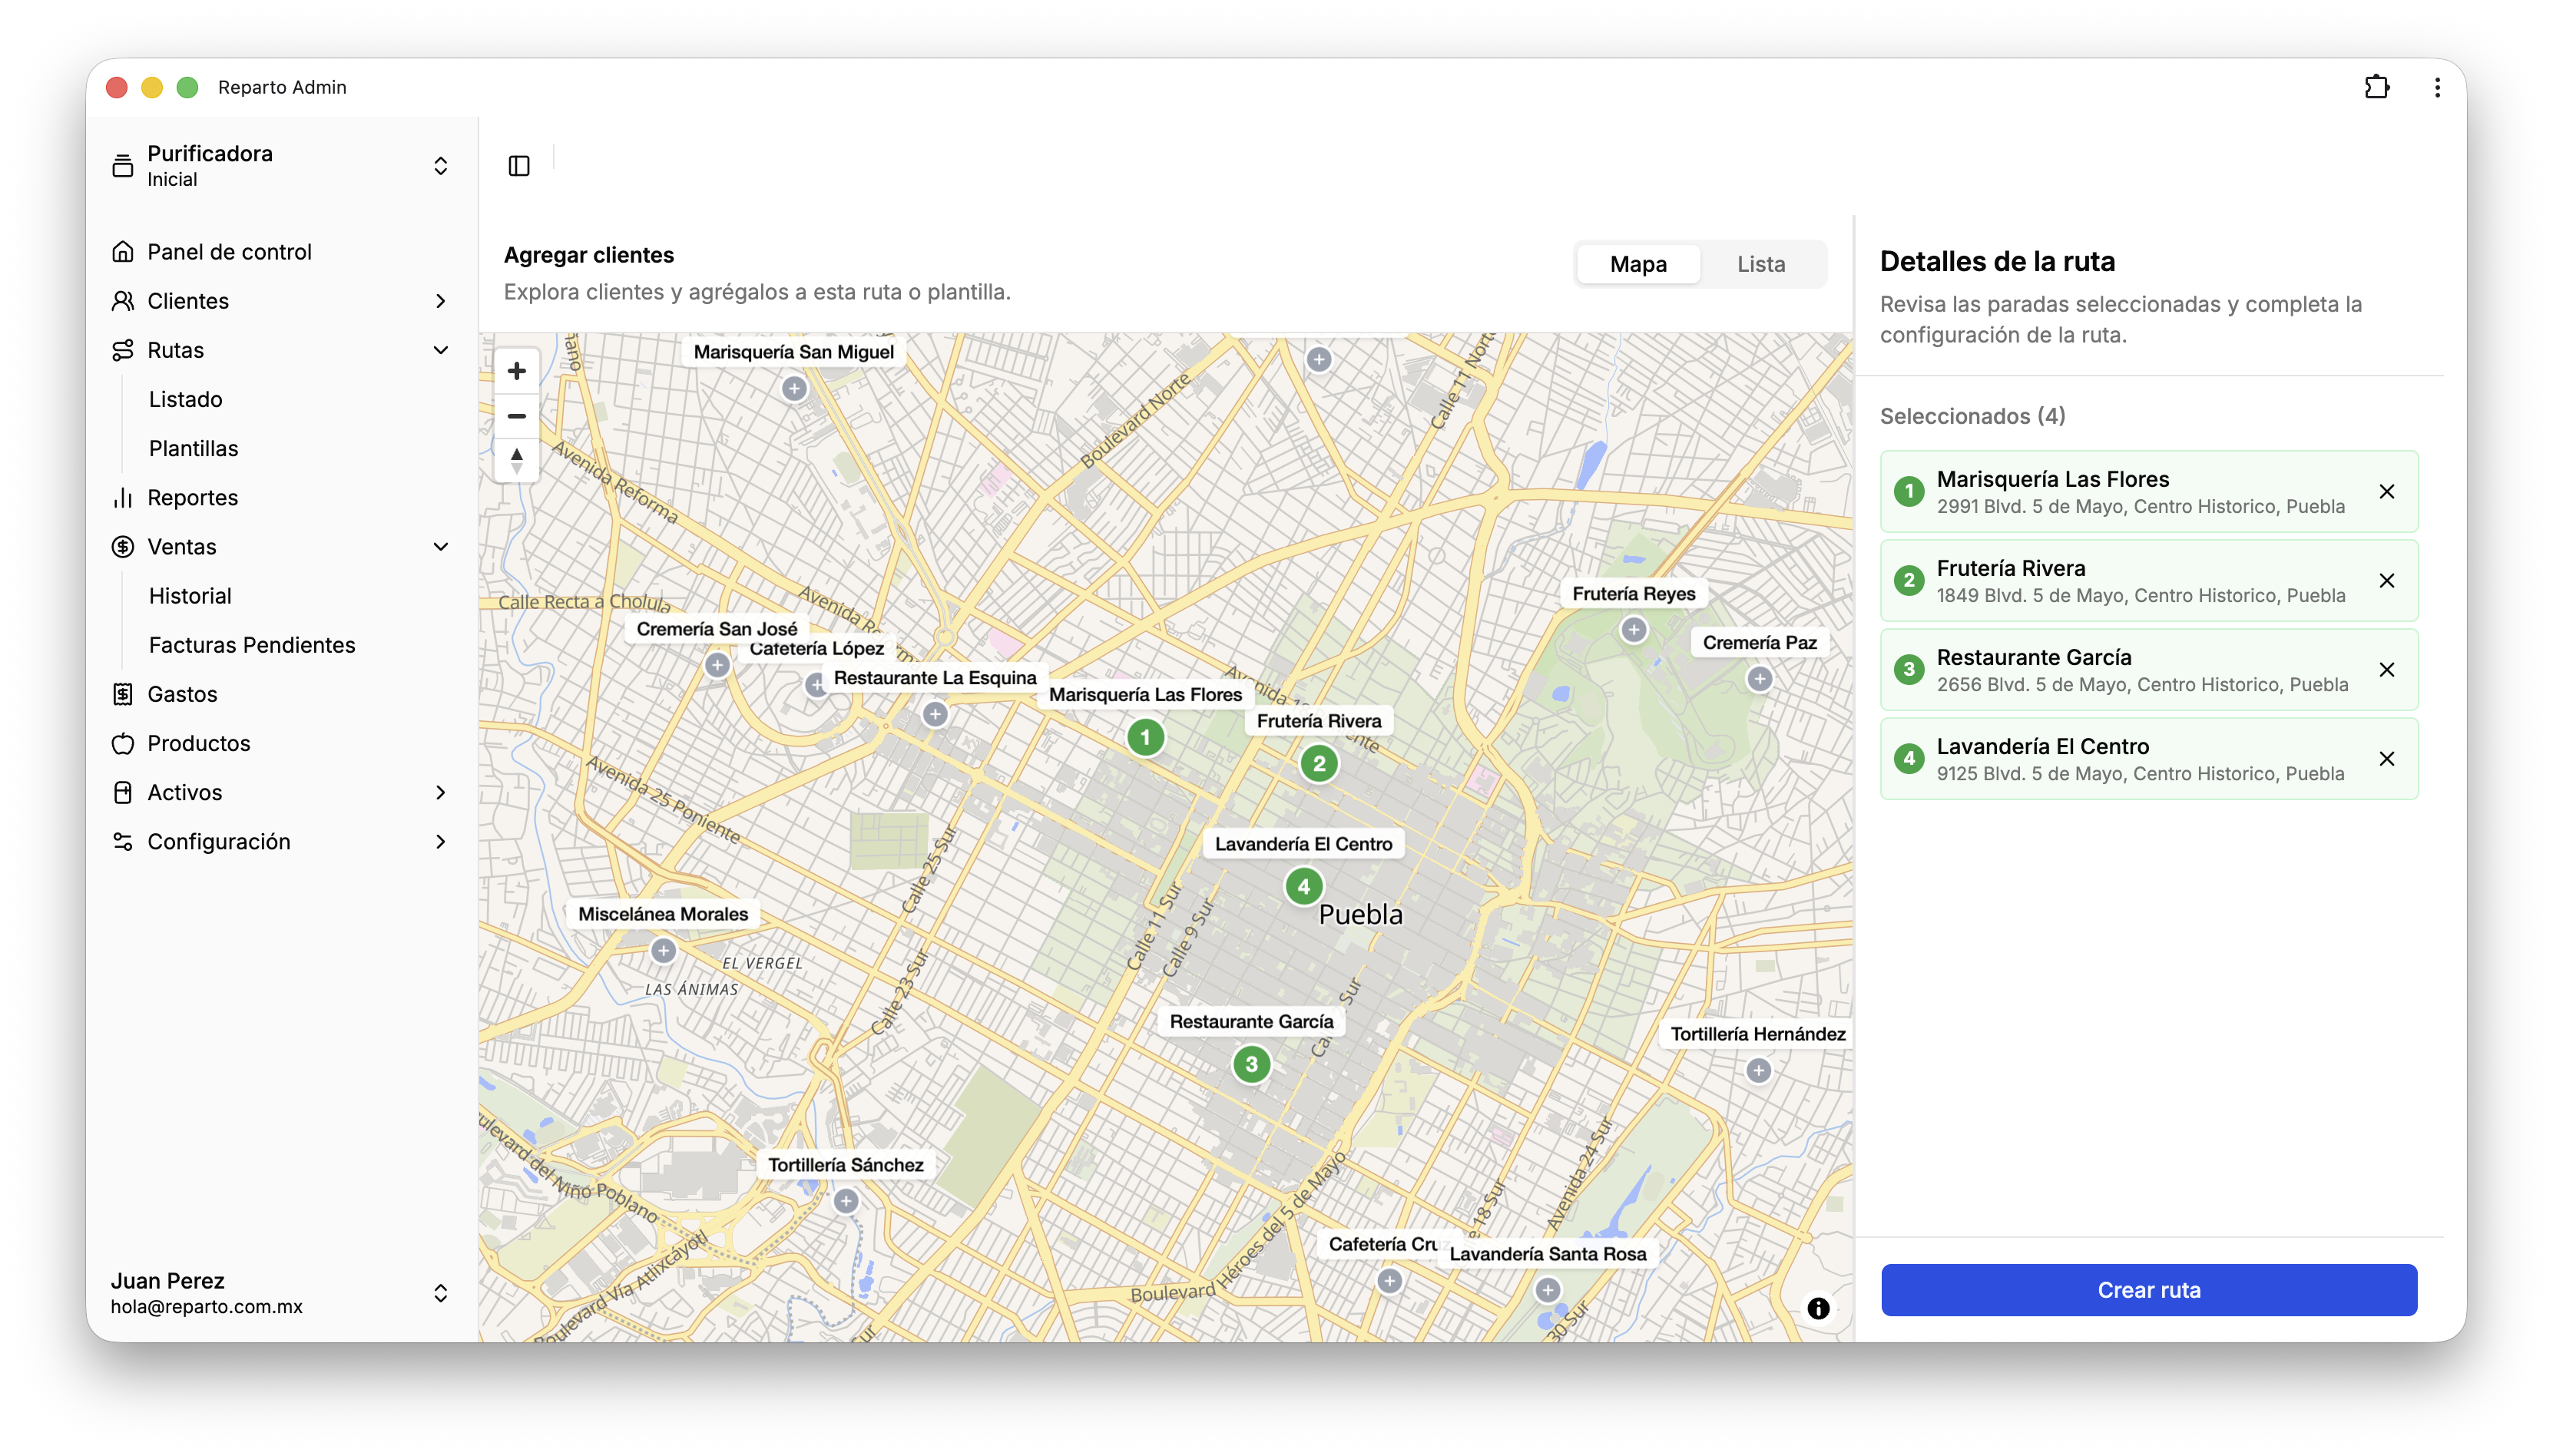
In this view, you can add customers by clicking their names on the map. You can also select customers from a list view if you prefer.
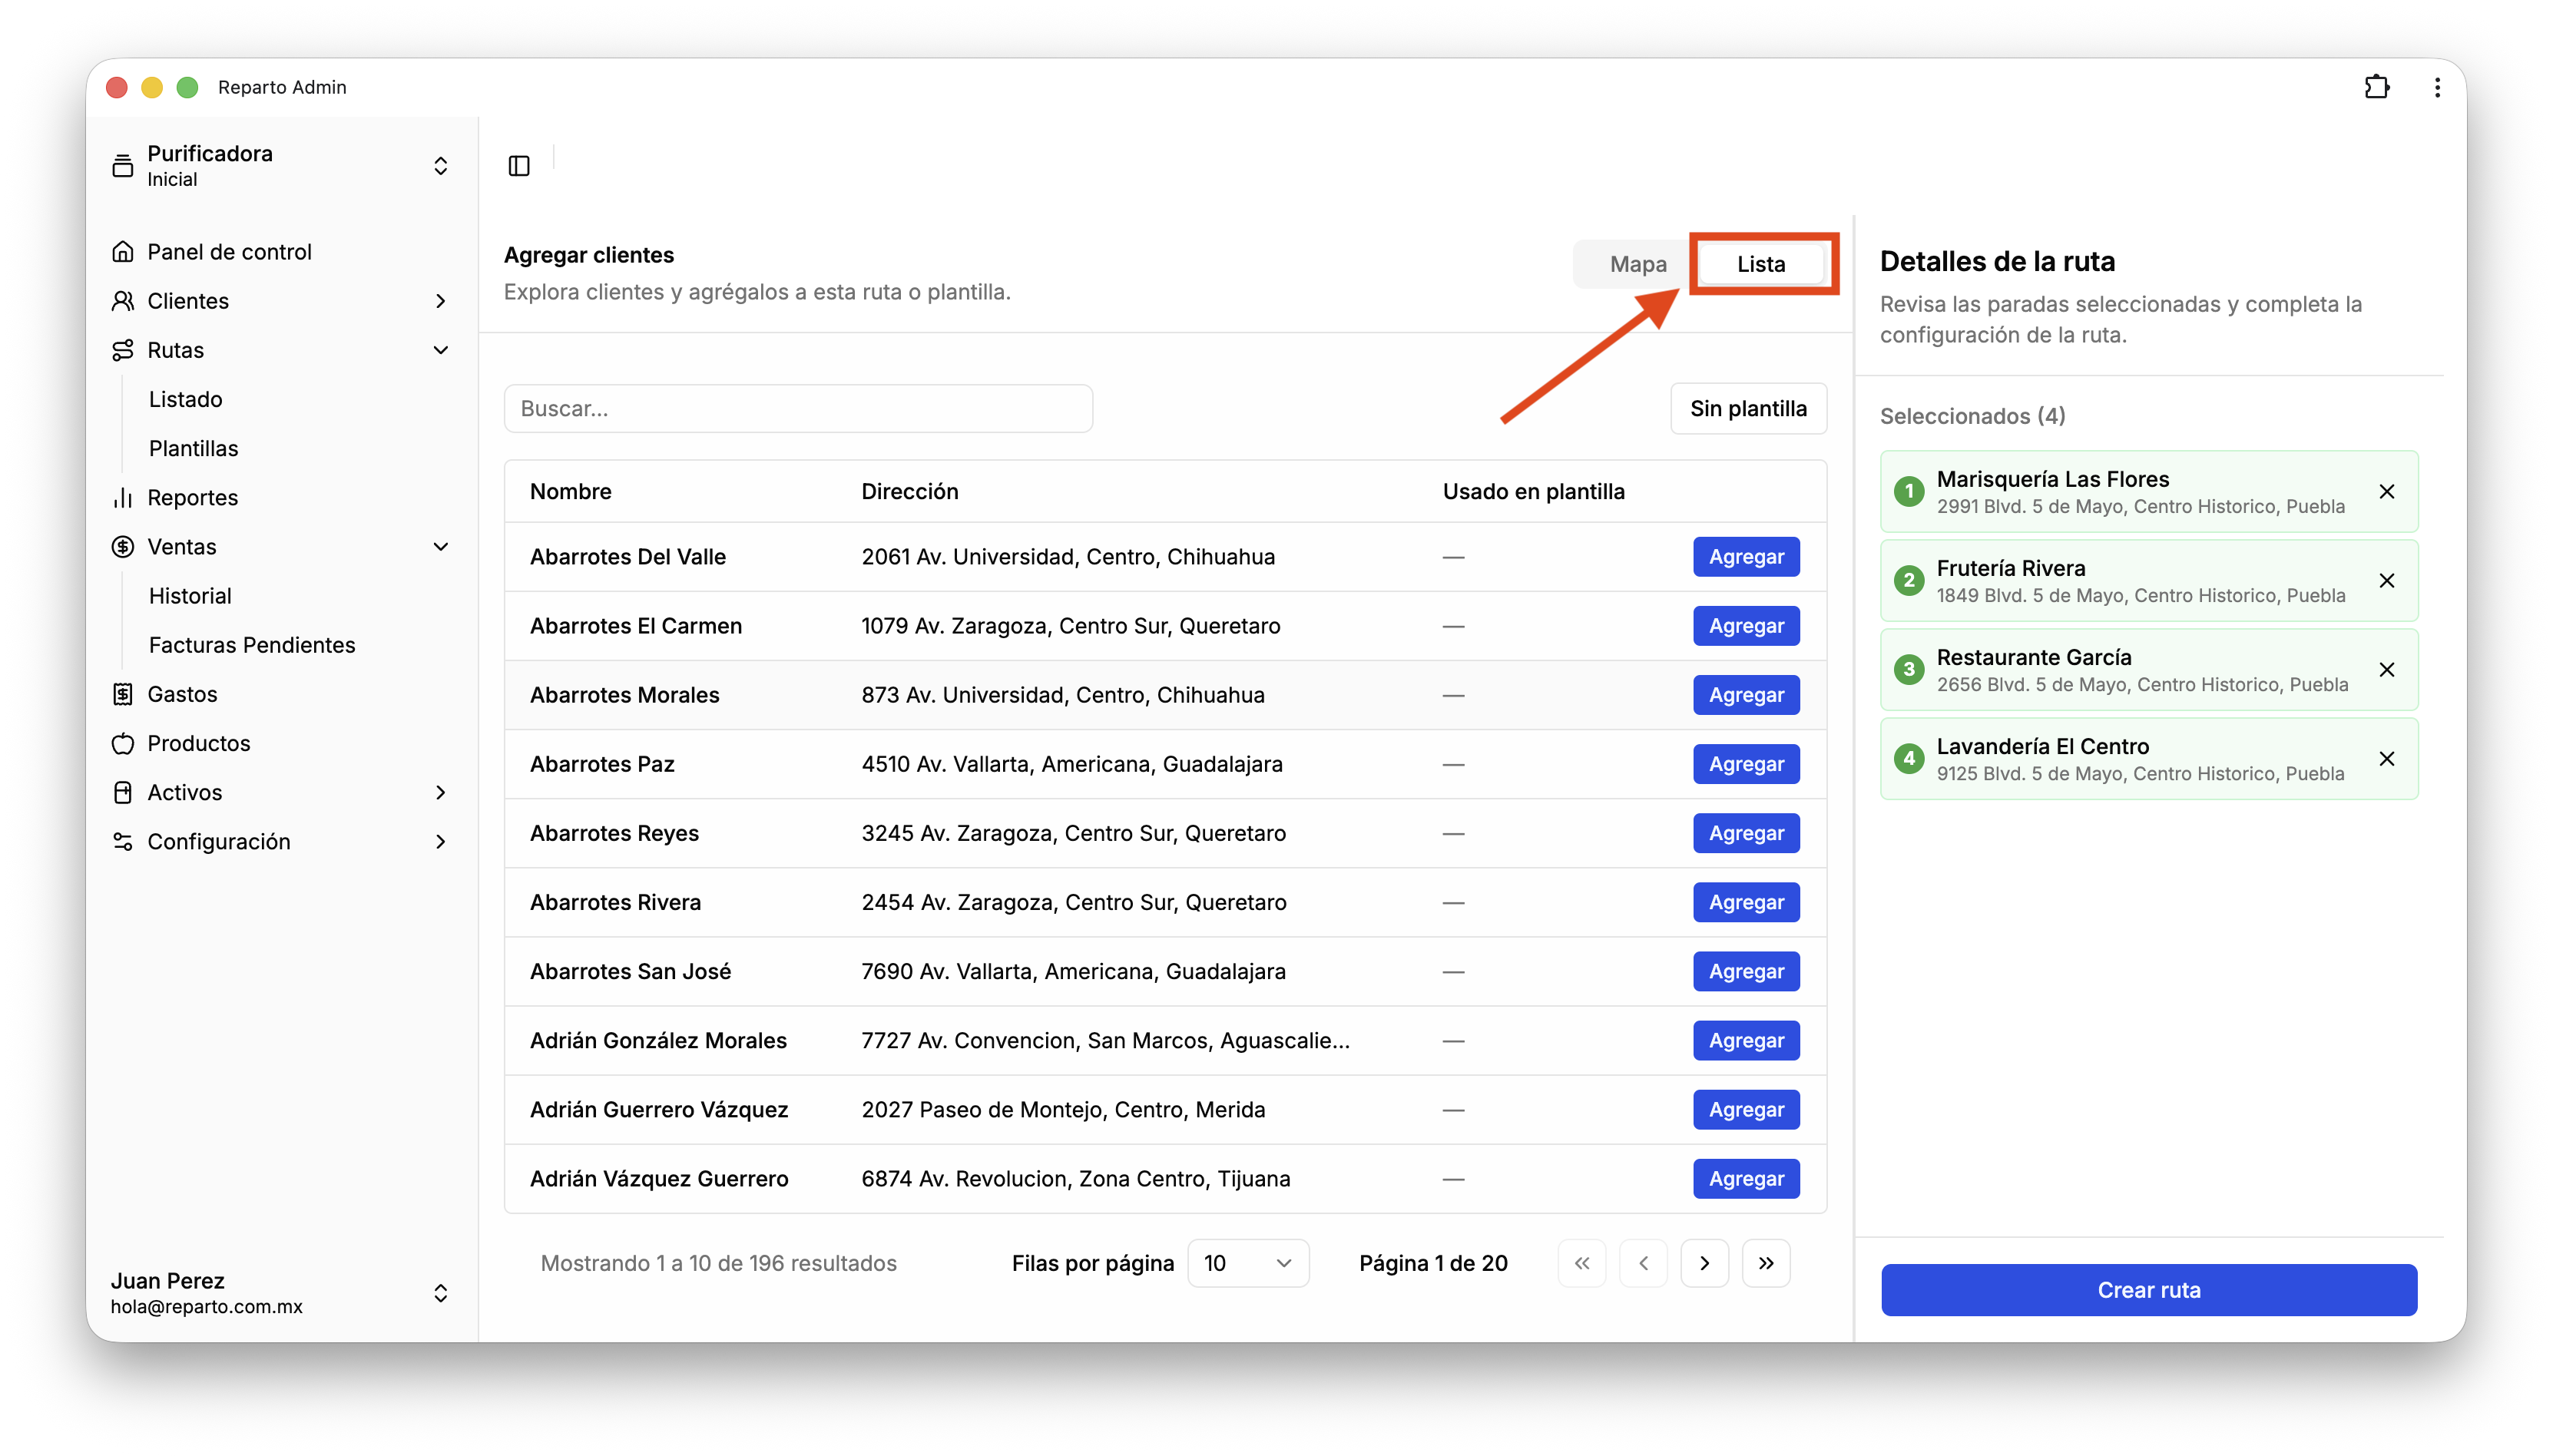
In the list view, you can search for customers by name and check if a customer is already assigned to a route.
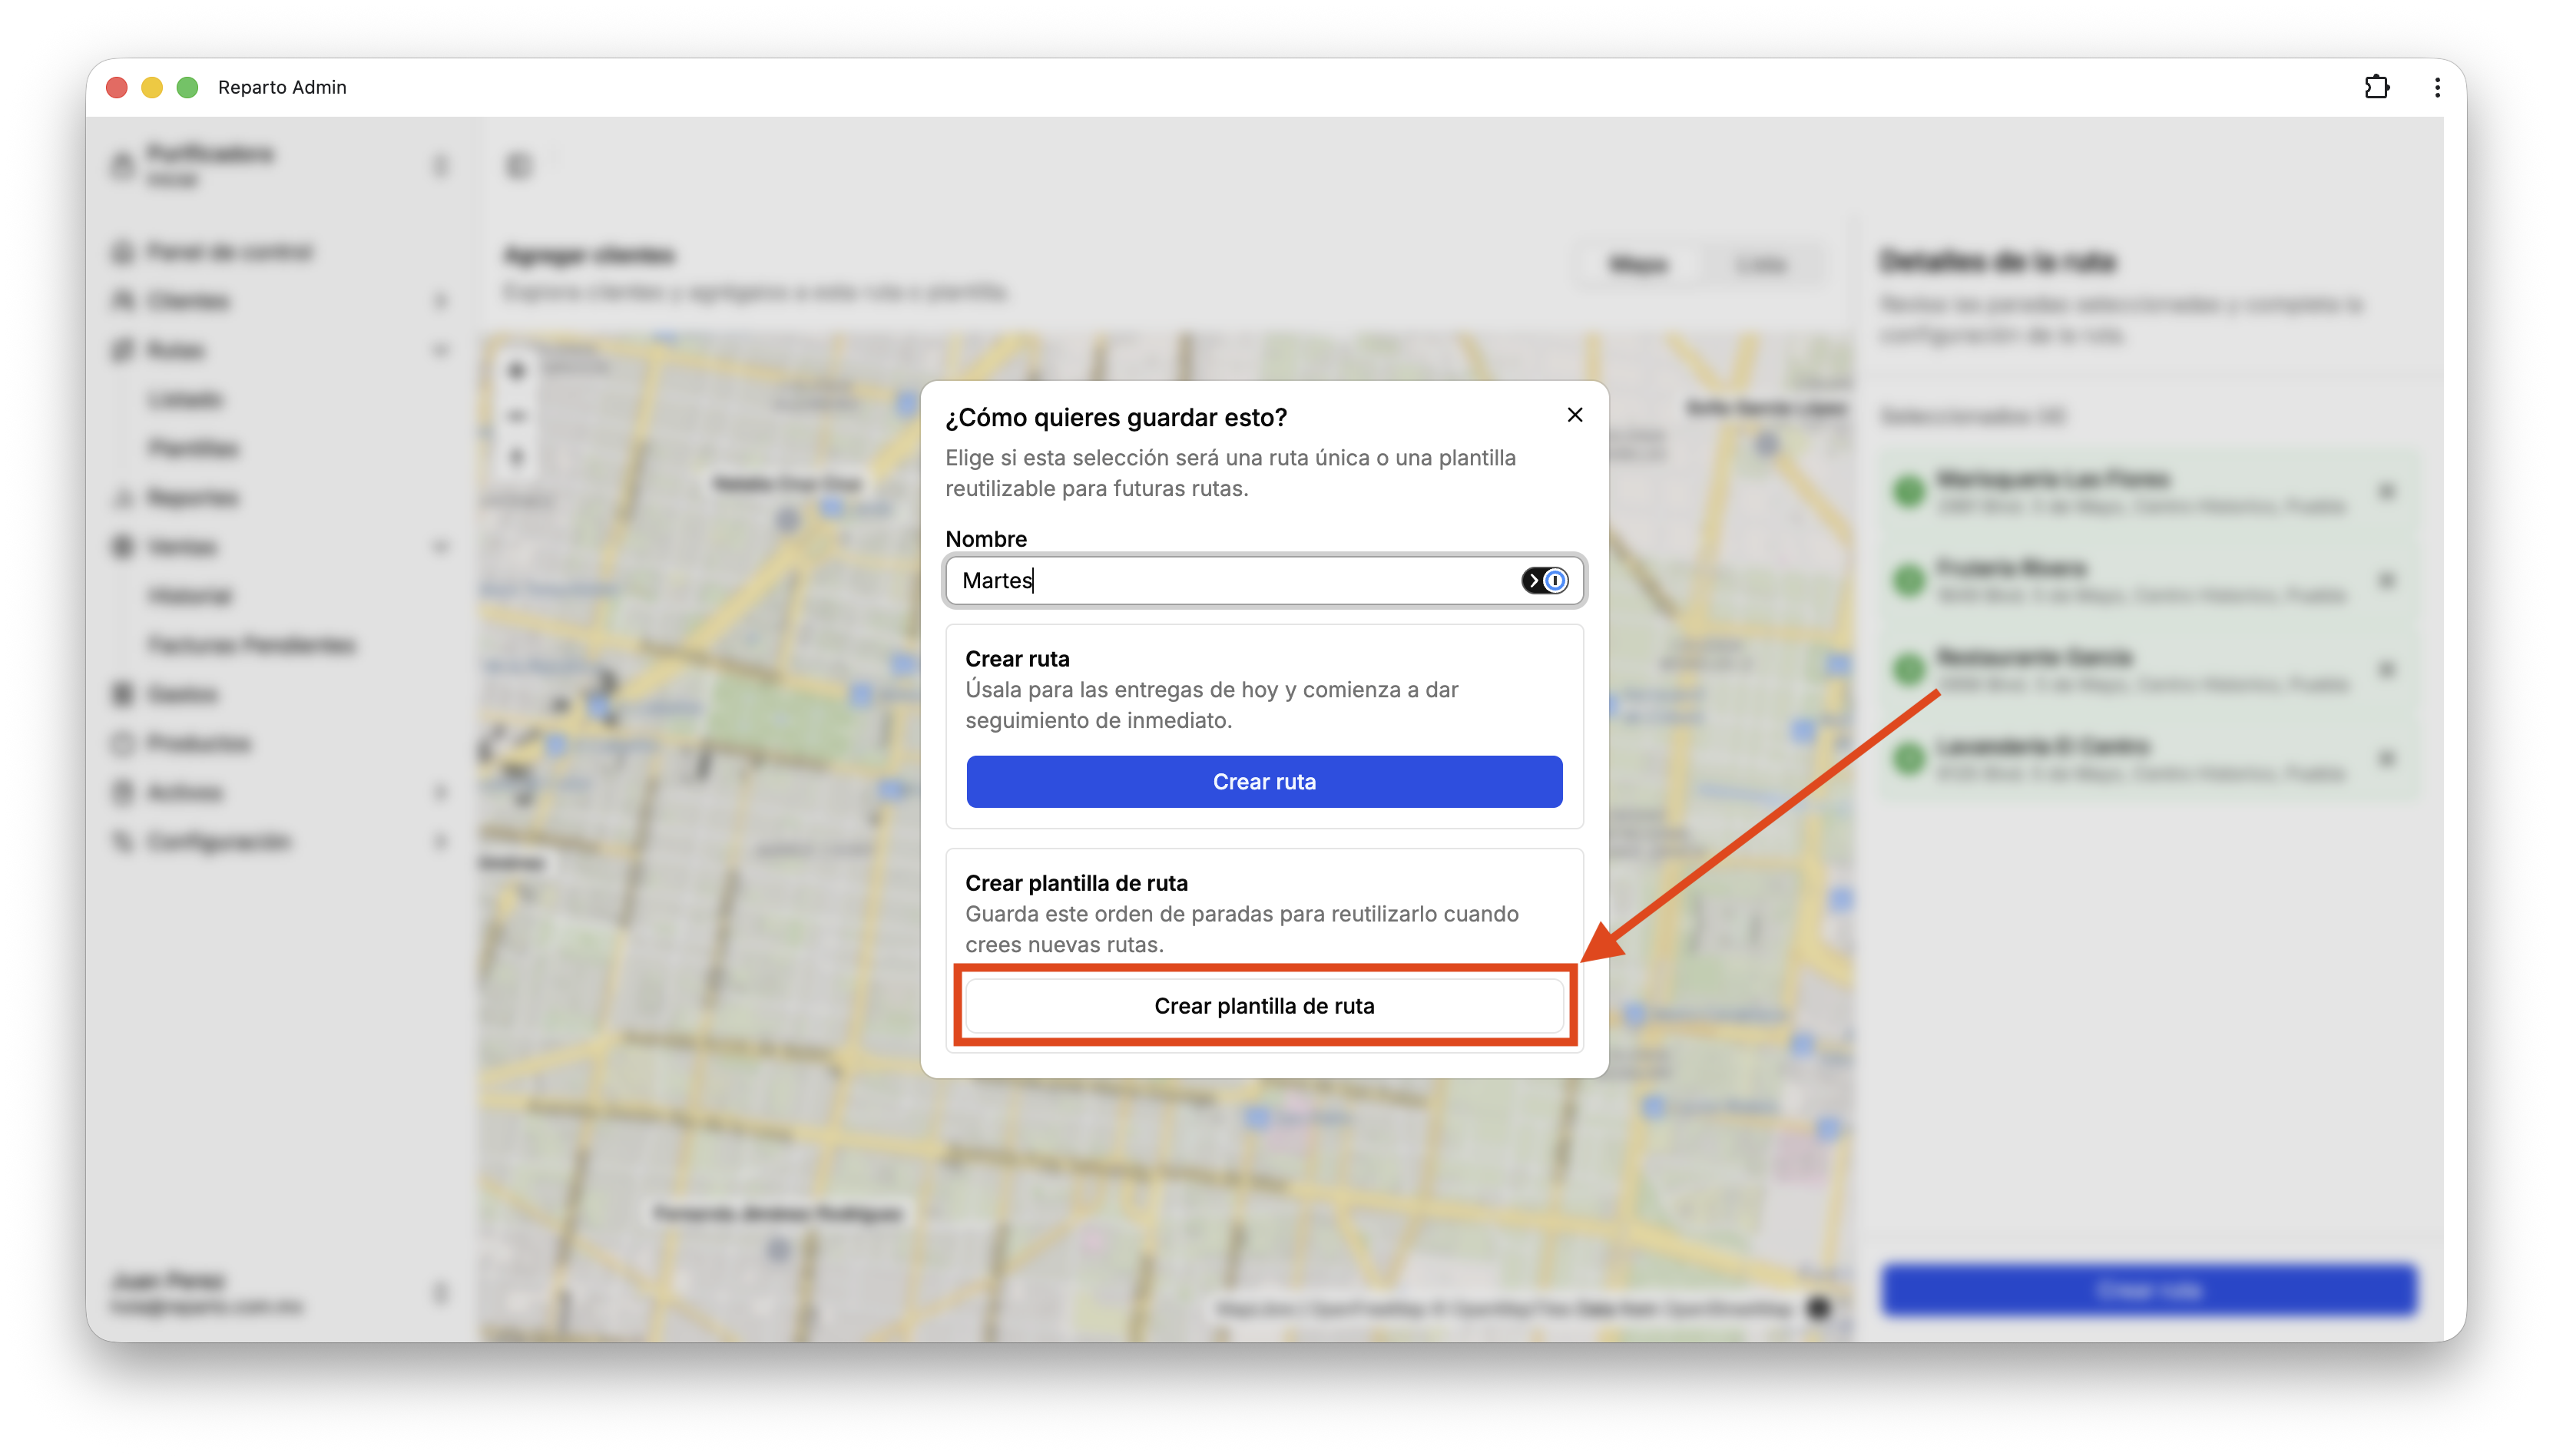
Here, you can assign the route a name and decide whether you want to save it as a route or as a template. Saving it as a template stores the customers in the route so you can reuse it multiple times. If you save it as a route, the route will start right away.
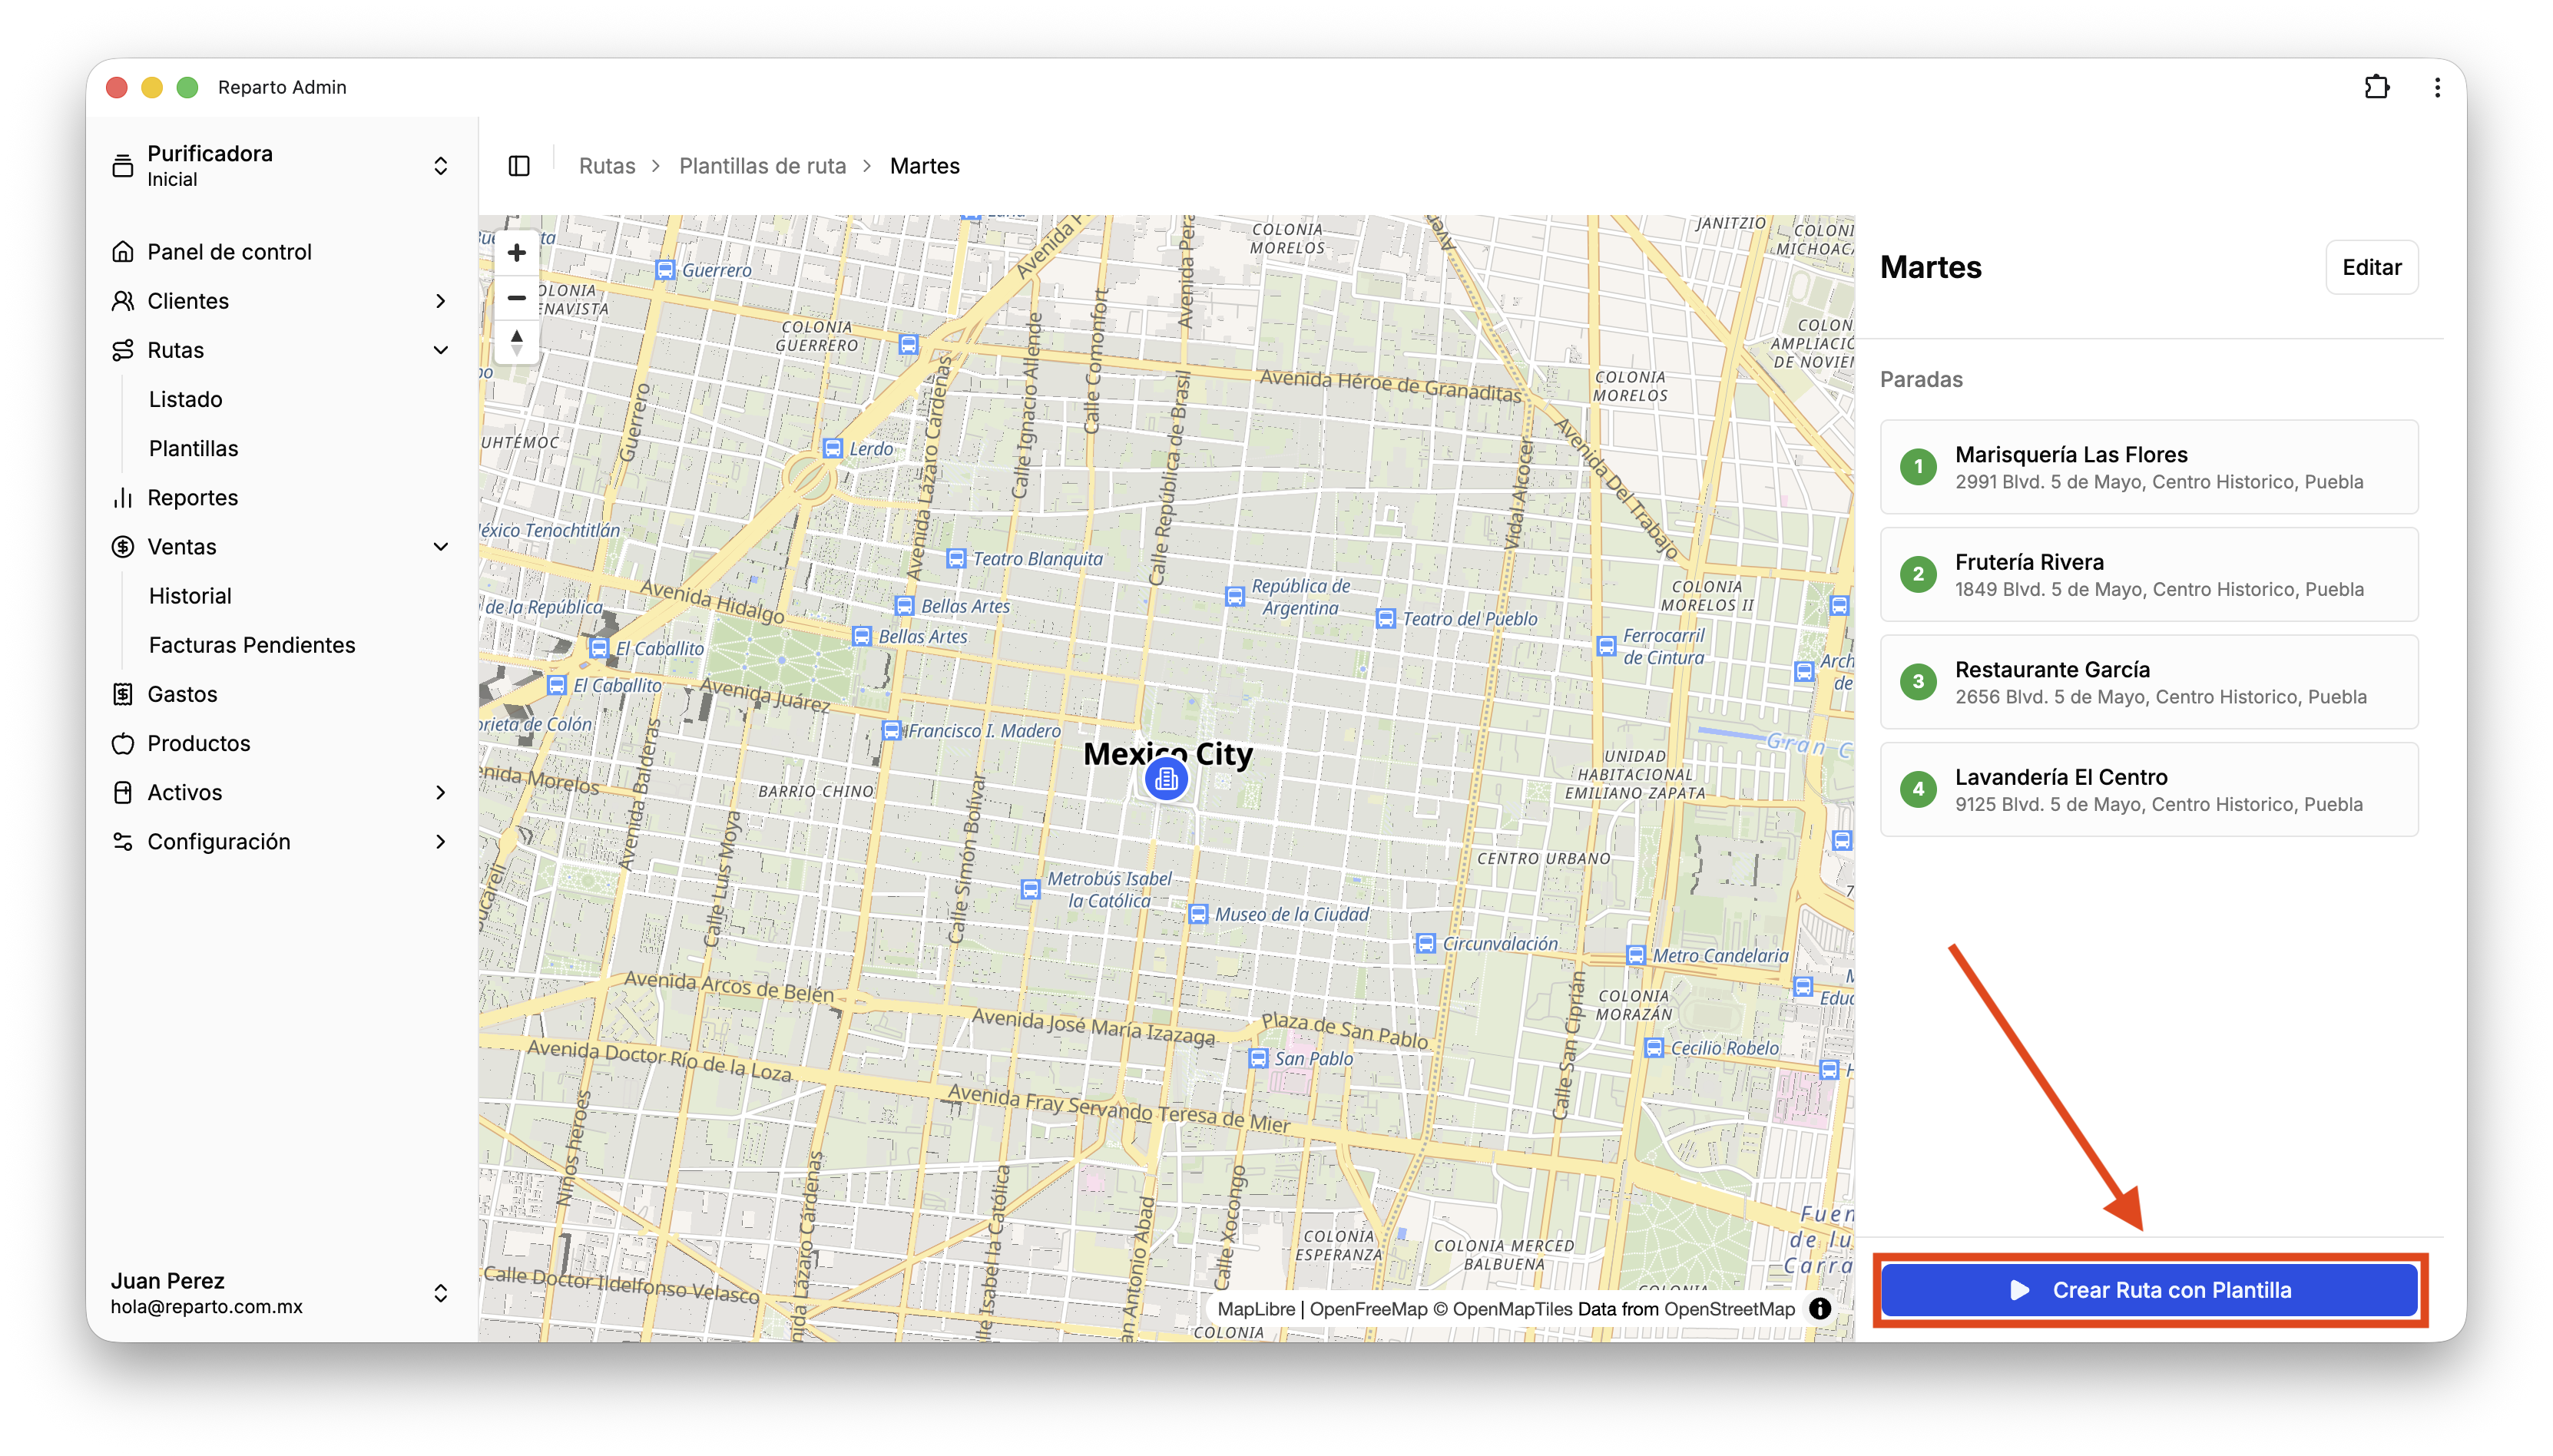
After saving a template, you can see the final list of customers assigned to the route template, and reuse it multiple times. To start a route using the template, press "Create route" at the bottom of the list.
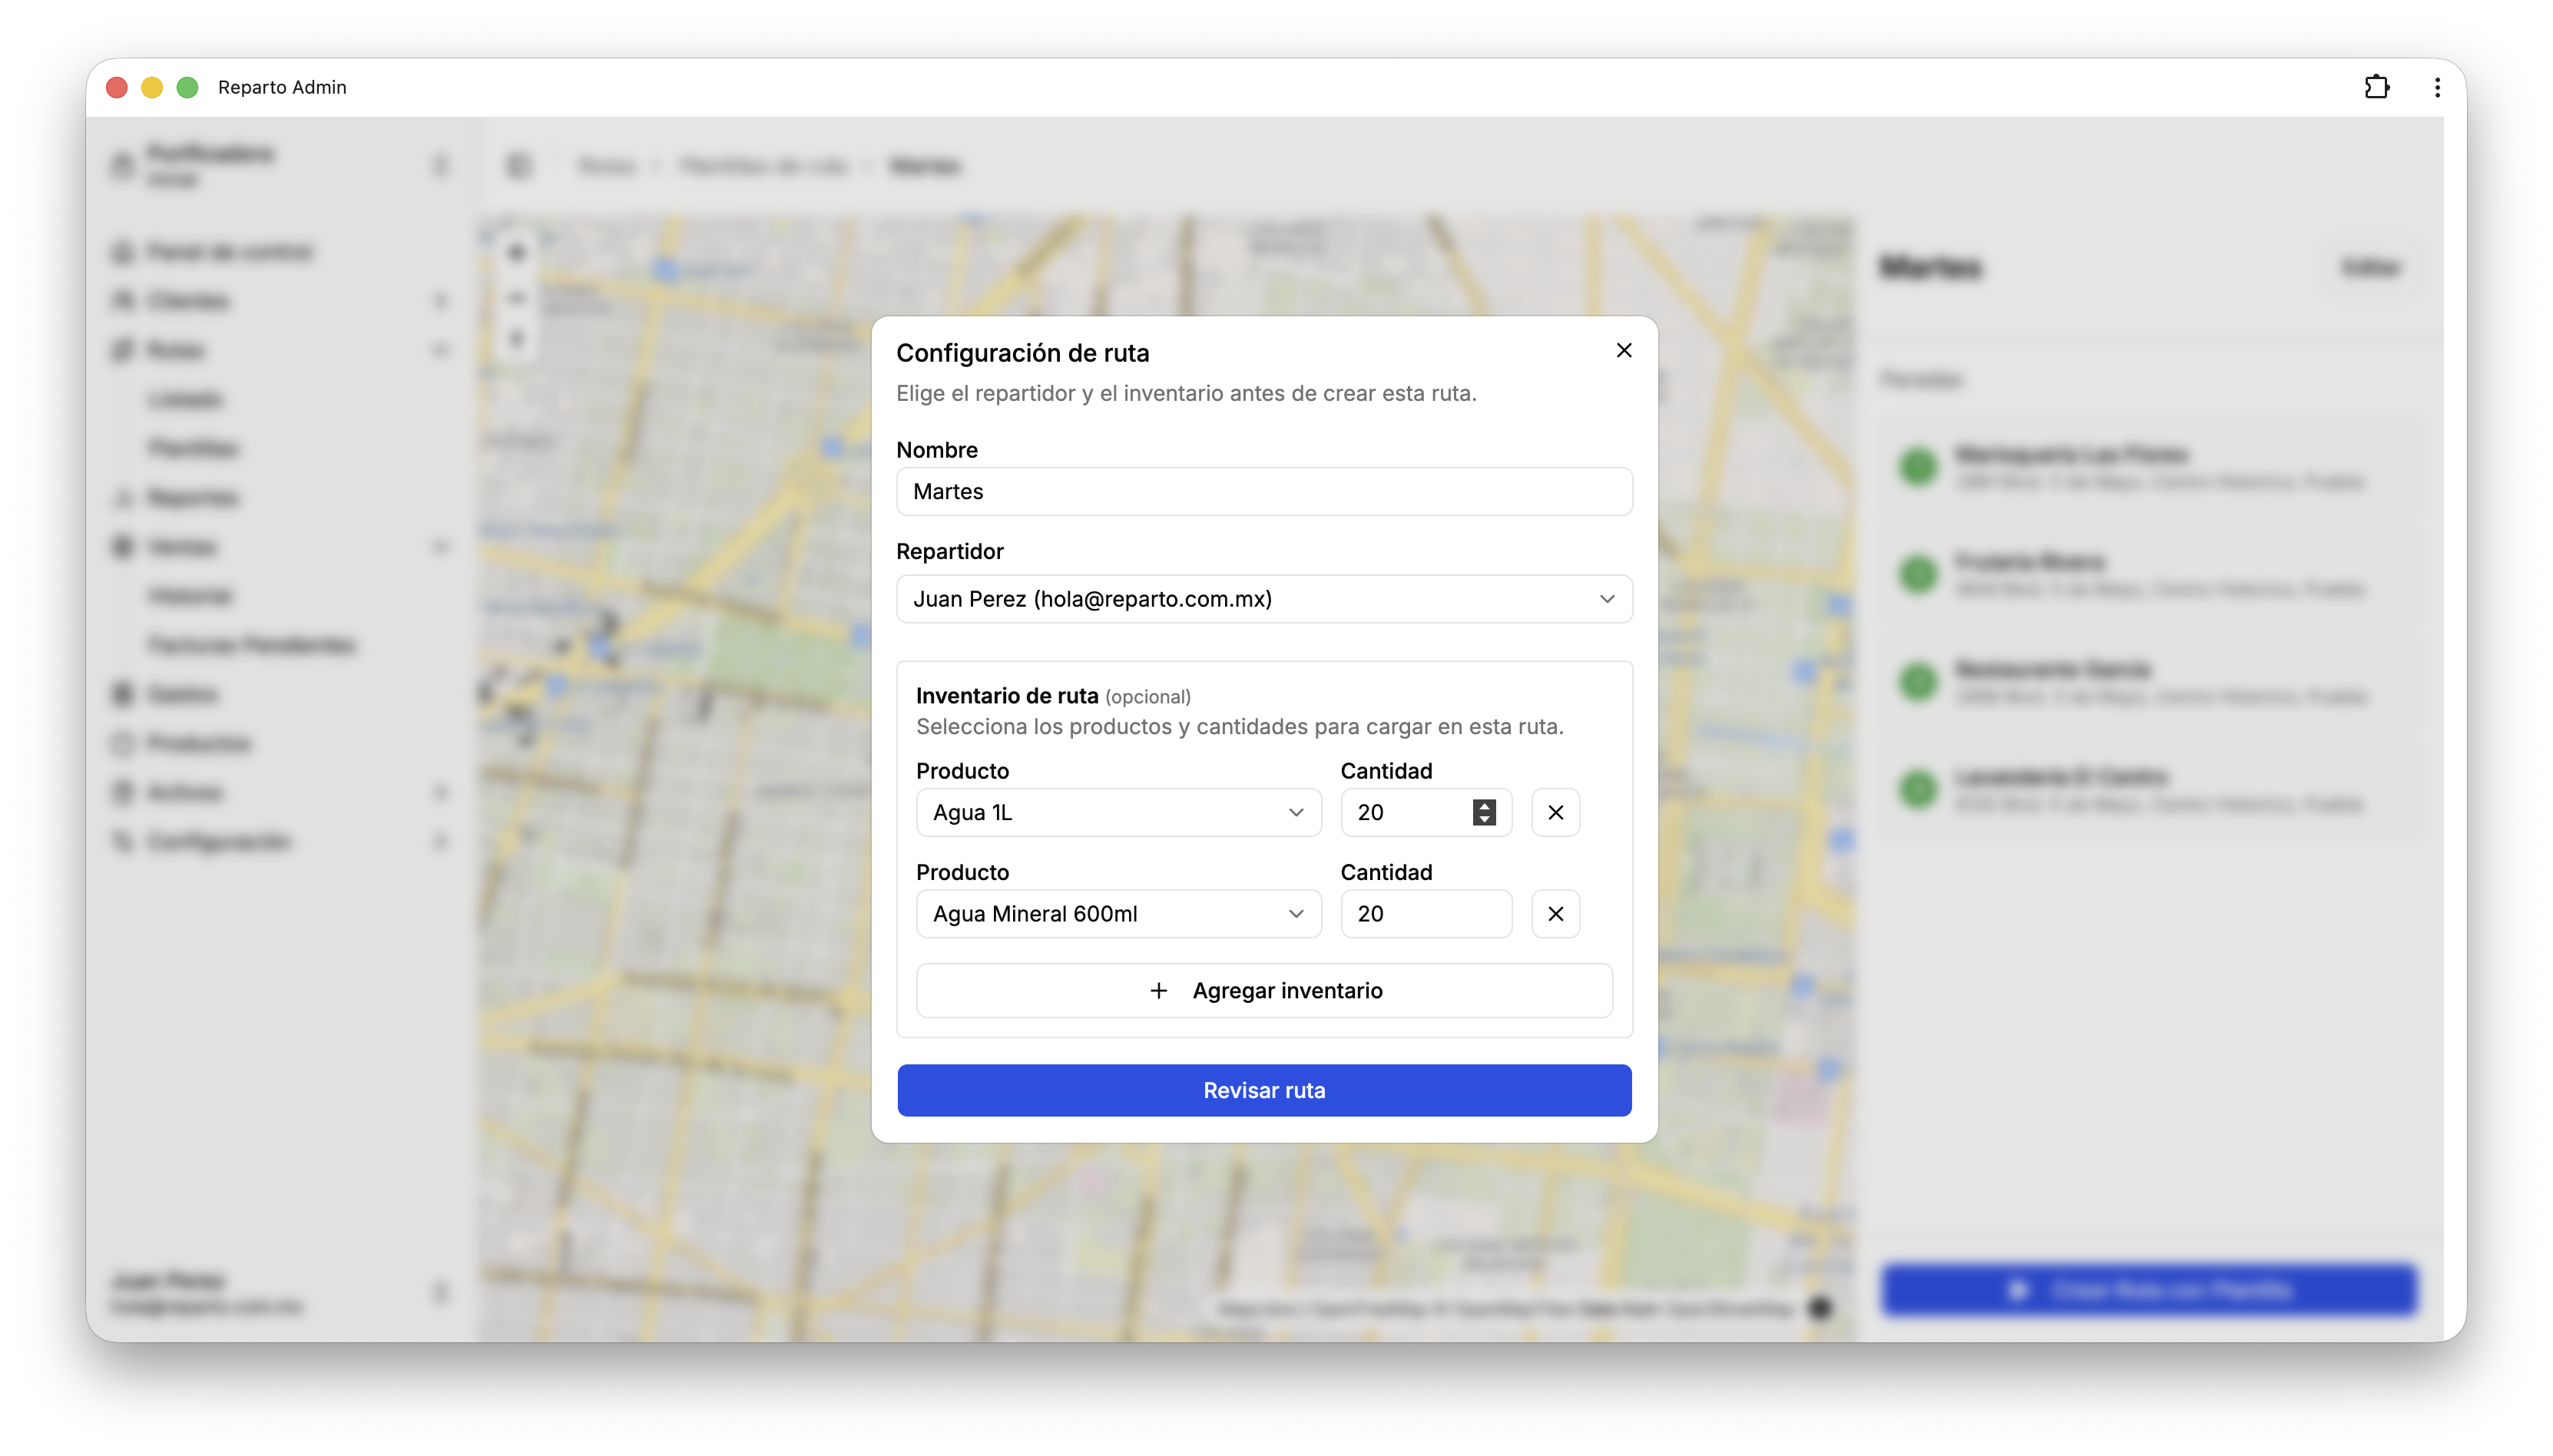
In this popup, you can assign a seller or delivery driver and add inventory if needed. Inventory helps you track what is left during the route and keep a record of sales.
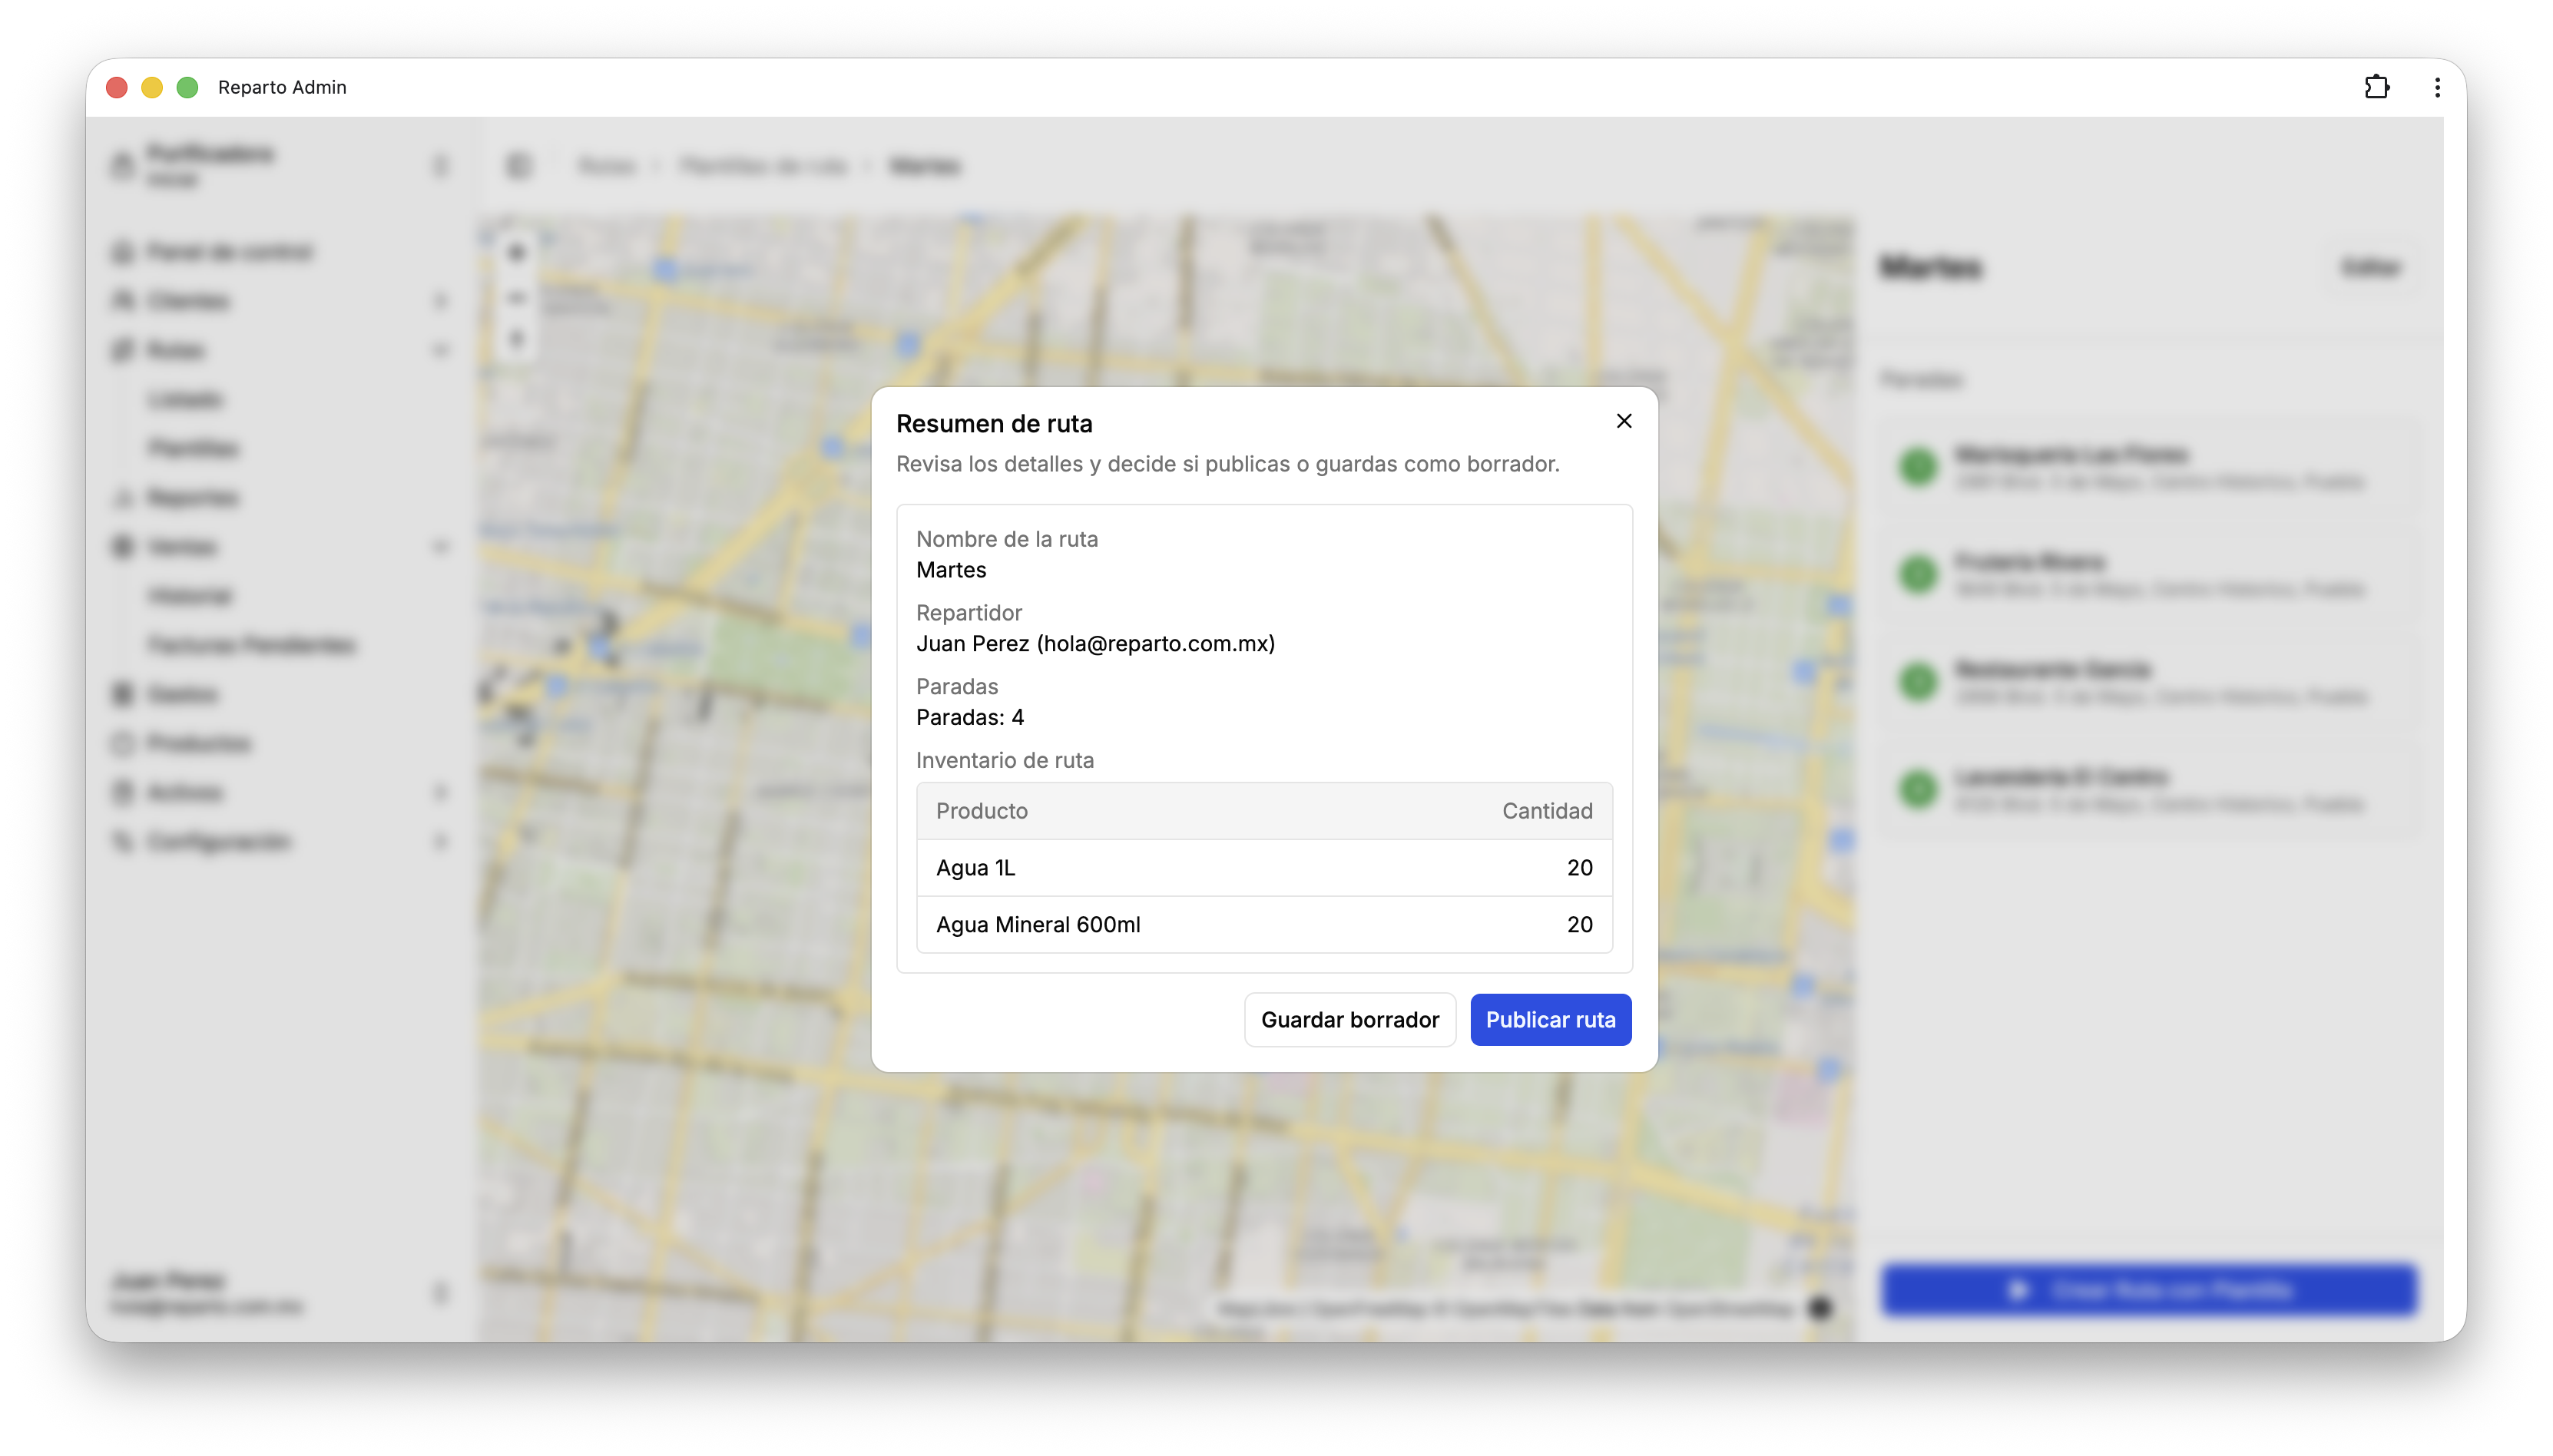
In this popup, you can review the final route overview. If you publish it, the seller or delivery driver will be able to see it in the mobile app. You can also save it as a draft; in that state, the route will not appear in the app, and you can continue modifying it if needed.
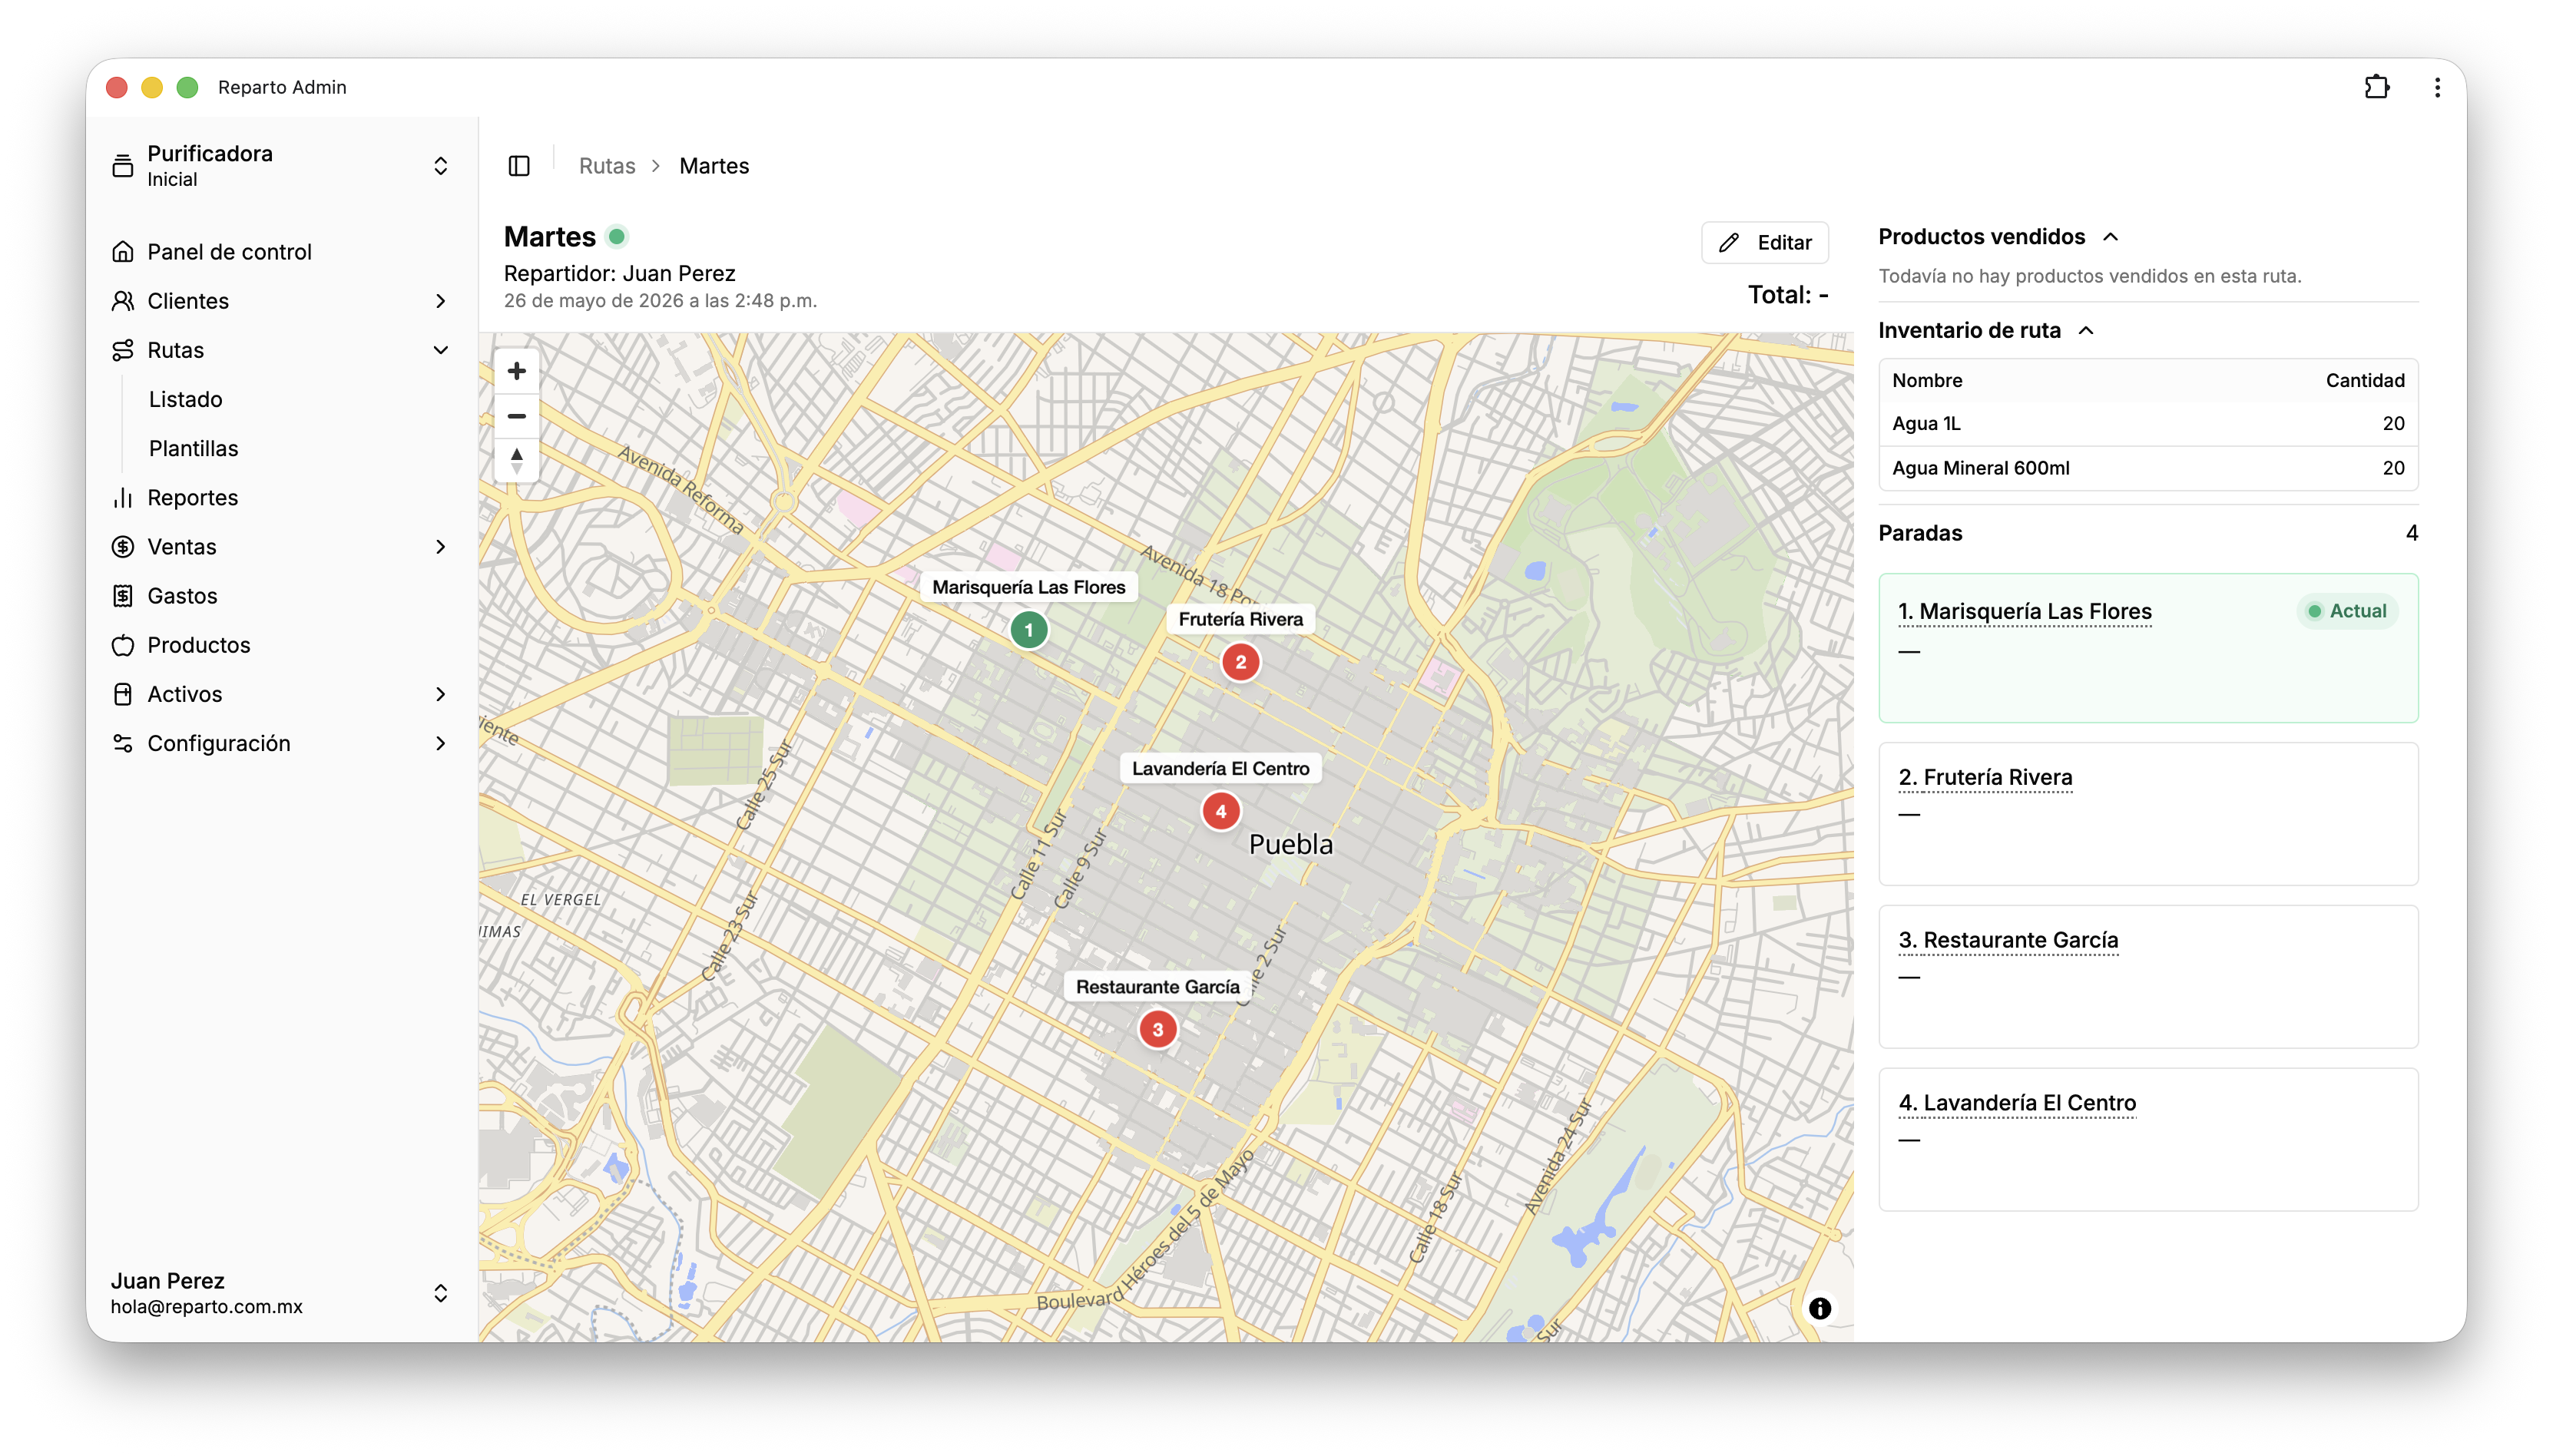
If the route is published, everything is ready. On this page, you will get real-time notifications when your seller or delivery driver visits a customer or makes a sale on the route. You will also be able to see the inventory, total sales, and products sold.